


Chain 4.

Join into 1st chain with a slip stitch to form a circle.

Round 1:
Ch 4 (this counts as as hdc, ch 2). Now working out of the centre circle. Hdc, Ch2 (5 times)


Join to the 2nd Chain of your initial Ch 4 to form a wheel with 6 spokes (as shown below).

Round 2:
You are now going to be working out of the 6 spaces of your "wheel".
To begin sl st into the first space to the left of your hook.

Ch 3, sl st into same space.
Ch 5, sl st into the same space.
Ch 3, sl st into the same space.
You should have finished the first of your snowflake clusters and hopefully it looks something like the picture below.

Pretty simple eh?
You now want to fill the remaining 5 spaces with snowflake clusters. So go ahead and follow the instructions below:
*ch 1 (this carries you to the next space), sl st into the next space.
Ch 3, sl st, ch 5, sl st, ch 3, sl st*
Repeat between * and * 4 more times.
ch 1 and sl st into the very first sl st of this round.

You can now go ahead and fasten off. How easy was that!?!
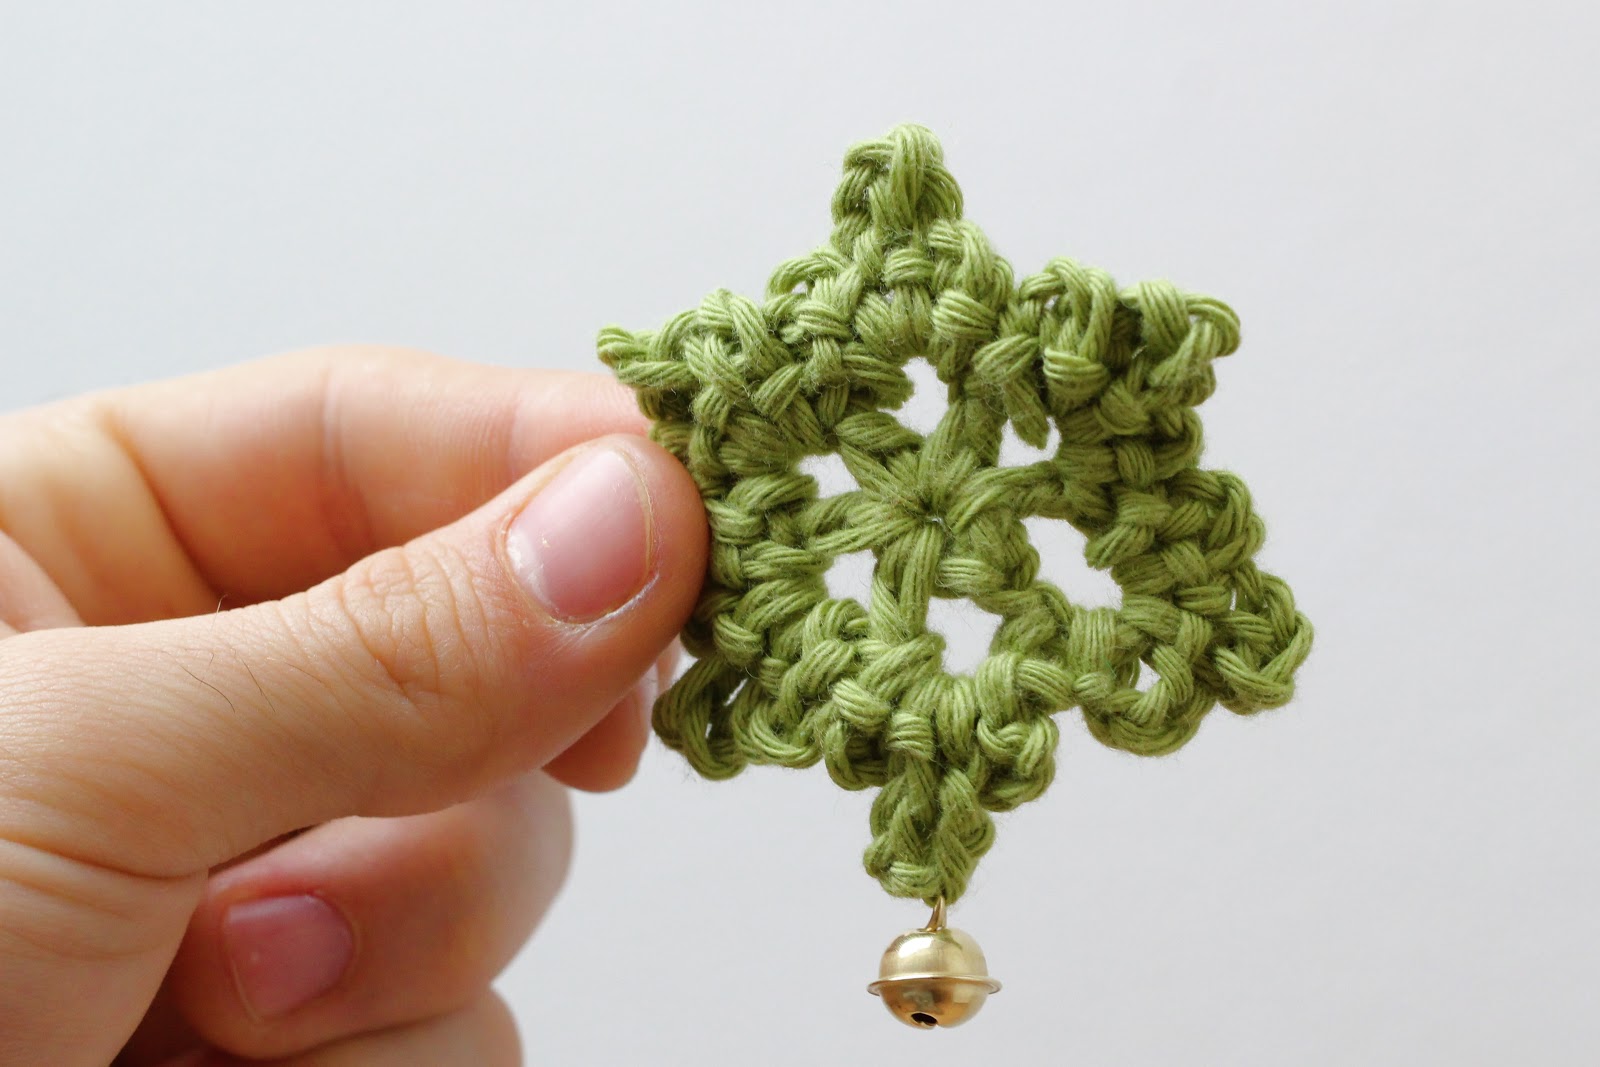
Alternatively you can add a little ball ball or bell to the centre of one of your snowflake clusters. To add a beel or ball ball to a snowflake cluster:
ch 3, sl st,
ch 3 and pull to make a lose stitch.

Remove your hook from your work and add the bell or ball ball of your choice.

Place your hook back into your work.
ch 2

sl st.
ch 3, sl st.
Continue your snowflake as normal.
Go ahead and sew in ends.

Hopefully your snowflake looks something like this?:
Now to finish these gorgeous little snowflakes! I recommend blocking them to get the best possible shape and appearance.
To do this I made my snowflakes wet and squeezed out any excess water.

I then blocked the snowflakes to a piece of polystyrene (a piece of
cardboard box will also do the trick!), Stretching them out into the
desired shape.


Nessun commento:
Posta un commento